I don’t like to clean but do enjoy knowing my bird, Mango, is happy and healthy. Here are some tips on how to use best practices to keep a clean bird cage on a daily, weekly, and monthly basis. What tips and tricks do you have to share?
Cleaning your bird’s cage can at first seem like a tedious chore. With so many bars, cracks, and crevices to scrub, it can be hard for new bird owners to figure out where to start.
Setting and adhering to a cleaning schedule for your bird’s cage is essential to keeping this job as easy to handle as possible. Breaking the process down into simple tasks to be completed daily, weekly, and monthly not only saves you time and energy but ensures that your bird always has a clean and comfortable cage to live in.
Daily Cleaning

Dirty cages can lead to a host of serious health problems in birds. Certain cleaning must be done every day to minimize your pet’s risk of infection. Follow these simple steps daily to make sure that your bird’s cage stays in top condition:
- Change the cage liner. In addition to being uncomfortable, it is unhealthy for birds to walk around in discarded food and droppings. Unchanged cage papers can also emit a very unpleasant stench. Avoid these problems by making sure to replace the liner of your bird’s cage every day.
- Clean Food and Water Dishes. Remove your bird’s food and water bowls daily and wash them with a mild dish detergent. This will prohibit the growth of bacteria that can potentially harm your pet. Make sure to rinse and dry them thoroughly before placing them back in your bird’s cage.
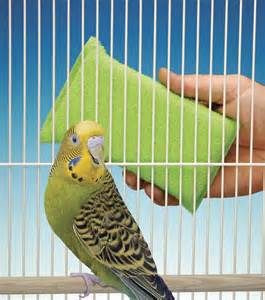
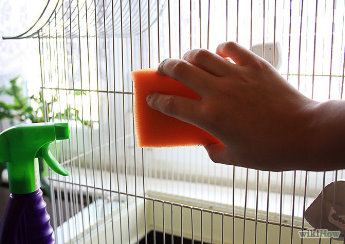
- Wipe Down Surfaces. Using a damp rag or paper towel, spot clean the surfaces of the cage, including the bars, perches, and any toys. To clean stubborn, stuck on messes, use a bird-safe cage cleaner.
Weekly Cleaning

Decide on a certain day each week to complete weekly cage cleaning duties. Keeping up with these tasks helps to reduce the chance of germs and bacteria taking up residence with your bird.
- Wash the Cage’s Tray. Birdcages have a tray at the bottom that the cage liners are placed on. This tray should be removed at least once a week and scrubbed with a damp rag and cage cleaner. Remember to make sure that the tray is dry before putting the liners back in and replacing it.
- Remove and Scrub the Grate. Some bird cages have a grate at the bottom of the cage that hangs suspended over the tray so that the droppings fall through to the bottom. This grate should be scrubbed weekly to remove any dried droppings that may have collected on it. The easiest way to clean a grate is to place it in a bathtub and use a scrub brush to remove the waste. As with all cage parts, make sure that it is completely dry before returning it to the cage.
- Clean and Change the Perches. Perches can also accumulate dirt and waste and are a potential breeding ground for bacteria. They should be soaked and scrubbed once a week to remove any germs that may be hiding from them. Some perches, especially the wooden ones, take quite a while to dry after they’ve been cleaned, so it’s a good idea to keep a few “back-up” perches on hand. Put these in your bird’s cage while the ones that you’ve cleaned are drying.
- Clean and Rotate Toys. Much like human babies, birds use their mouths to explore and play with their toys. Once a week, any toys that are in your pet’s cage should be removed, soaked, and scrubbed. As with the perches, it may be helpful to have a variety of toys on hand for your bird. That way, you can rotate the toys every week when you do your cleaning, effectively making sure that your bird does not get bored with his playthings.
Monthly Cleaning

Once a month, you should do a thorough cleaning of the whole cage. If it is not too big, the easiest way to do this is to remove the perches, toys, dishes, grate, and tray and place the entire cage into the bathtub. Those with larger cages often take them outside to a deck or patio, using a water hose to spray the cage off. Do whatever works best for you, but make sure to follow these important tips:
- Use a Good Scrub Brush. Buy a sturdy scrub brush with durable bristles to scrub the bars and base of the cage with. Use a cage cleaner to help break down stuck on material that is hard to get off.
- Make Sure to Scrub the Cracks. Bird cages, particularly at the base, often have many cracks and crevices that provide an ideal place for germs to grow. Use the bristles of the scrub brush to get down into any grooves in the birdcage, and don’t forget to scrub the corners where the bars are welded together.
- Rinse and Dry Thoroughly. Always remember to rinse every inch of the cage completely, to remove any remnants of cleaners or detergents. Once the cage is clean, wipe it down with a towel before placing your bird inside. Wet birds get chilled easily, so it is important to make sure that the cage is completely dry.
Maintaining a clean environment for your pet takes only a few minutes a day, but can possibly add years to your bird’s life. Cleaning your bird’s cage may seem like a lot of work, but you will find that if you stick to this simple schedule, you can complete the job with minimal time and effort. Do your part to make sure that your pet stays happy and comfortable by keeping his cage fresh, tidy, and germ-free.
Please share your best practices and how you keep a clean bird cage.
Mahalo,
Paco
5,298 total views, 5 views today
